Make your own sea gooseberry!

The sea gooseberry is a type of ctenophore, which means “comb jelly.” They’re an ocean invertebrate that typically eat other tiny ocean creatures.

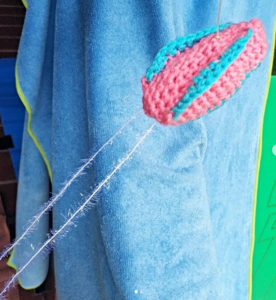
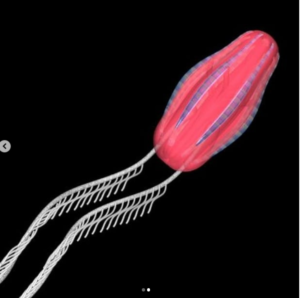
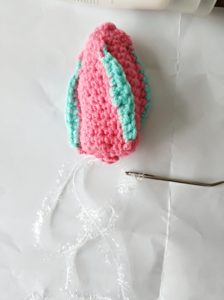
Here’s what we’ll be making, along with the image that inspired it.

 (original photo from Comb Jellies Wikispaces)

Skill level: Beginner

Materials needed:

  • Blue yarn
  • Pink yarn
  • Novelty white/fluffy yarn
  • Small crochet hook (I used a 2.00 mm hook [US 0, UK 14])
  • Tapestry needle

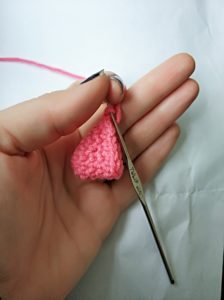
1.  With pink yarn, make a magic circle with 6 sc. Slip stitch the beginning stitch to the end to join the circle. (6 sts)

2. Inc 6 times (12).

3-5. Sc around (12).

6. (inc, 2sc) * 4 (16).

7-17. Sc around (16).

Stuff form with polyfill.

18. Sc2tog 8 times (8).

19. Sc2tog 4 times (4). Cut yarn, pull taut, and use a tapestry needle to hide tail inside the form.

Making the ridges

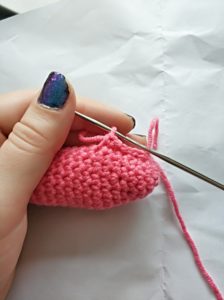
Join pink thread toward the beginning (magic circle) side of the form. Work in a line toward the bottom of the form as such:

4 sl st; 6 sc;  5 sl st.

Now join the blue thread on top of the pink line you just created. Work as follows:

2 sl st; 2 sc 2 hdc, 2 dc, 2 hdc; 2 sc; 2 sl st.

Repeat these steps to make as many ridges as you like. I made three.

Adding the tentacles

Using the novelty fluffy white yarn, thread a tapestry needle with a 12″ length of yarn. Simply insert the needle in the “bottom” of the ctenophore, just off the center of the ending four-stitch circle, and push it out a bit on the other side of the center. Pull the yarn out and even out both sides.

You can tie it in place if you want, but as long as no one tugs too much on the tentacles, they should stay in place just fine. Good job!

Make your own cute little ocean bacterium!

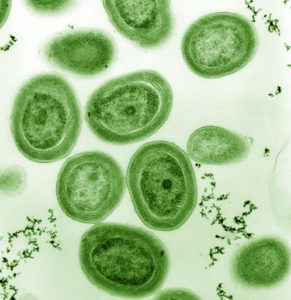
Let’s make a prochlorococcus bacterium! I didn’t know anything about this bacterium, but according to Wikipedia, it is a photosynthetic picoplankton (cute!) which is “among the major primary producers in the ocean, responsible for a large percentage of the photosynthetic production of oxygen” (https://en.wikipedia.org/wiki/Prochlorococcus). Without these little buddies, life as we know it would be very different!

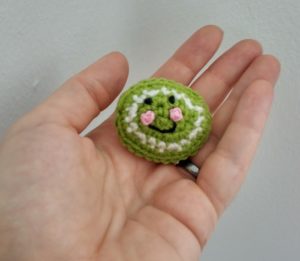
Here’s what we’ll be making and a picture of what inspired it. I thought I would add a little extra personality to the bacterium with a face. You can decide whether you want to include that or not.

  (image from Wikipedia)

Skill level: easy

Skills needed: basic crochet, basic embroidery

Materials needed:

  • green yarn
  • white yarn
  • black embroidery thread
  • pink embroidery thread
  • 1.9 mm crochet hook (or hook of similar size)

We will make two sides of the bacterium, embroider a cute face on one side, and slip stitch them together. To make the oval shapes, we make a chain, work along both sides, and then increase on each end in each row.

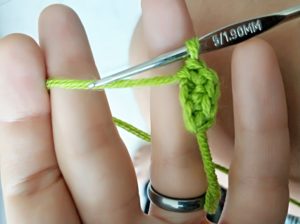
  1. With green, chain 4.
  2. Sc in 2nd ch from hook, and in each of the next 2 chains. Work 2 more sc in the same space as the last sc. 
  3. Turn the piece so you can work on the opposite side of the foundation chain. Sc in the bottom of the second sc you did on the other side. 2 sc in the bottom of your first sc on the other side. You now have 8 scs – 1 on each side and 3 on each end.
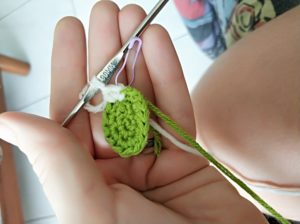
  4. Inc in first stitch and place marker in first stitch of new round. Sc, 3 inc, sc, 2 inc. Sl st last st to first st.(14)
  5. Changing to white yarn, chain one. In same st, inc. 2 sc, (inc, sc) * 3. 2sc, (inc, sc) * 2. (20) Skipping chain st, sl st first st to last st.
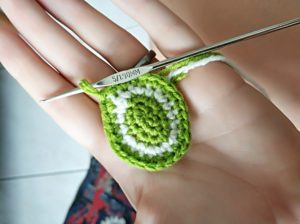
  6. Changing to green yarn, chain 1 and increase into same st.  3 sc, (inc, 2sc) * 3. 3sc, (inc, 3sc) * 2. Skipping chain st, sl st first st to last st. (26)

After finishing first oval, cut and weave in all ends, but do not cut green yarn after finishing the second oval.

Embroidering face

Embroider cute little face on one side! I used french knots for the black eyes and pink cheeks and backstitch for the black smile. Check the image at the top if you need more guidance, or google around for other ways to embroider faces if you prefer a different style. 

Finishing

Once you’re done with the face, start to slip stitch the two sides together. When you have just a few stitches left, stuff the form with polyfill or yarn snippings. Once filled, slip st the rest of the ovals together. Cut yarn and pull the end into the form with your hook. Done!

Make your own radiolarian!

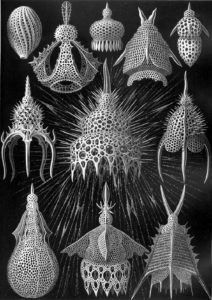
Radiolaria are beautiful little protozoa. I learned about them when reading about the biological artist Ernst Haeckel, who portrayed them beautifully. 

 (image from The Scientist Magazine)

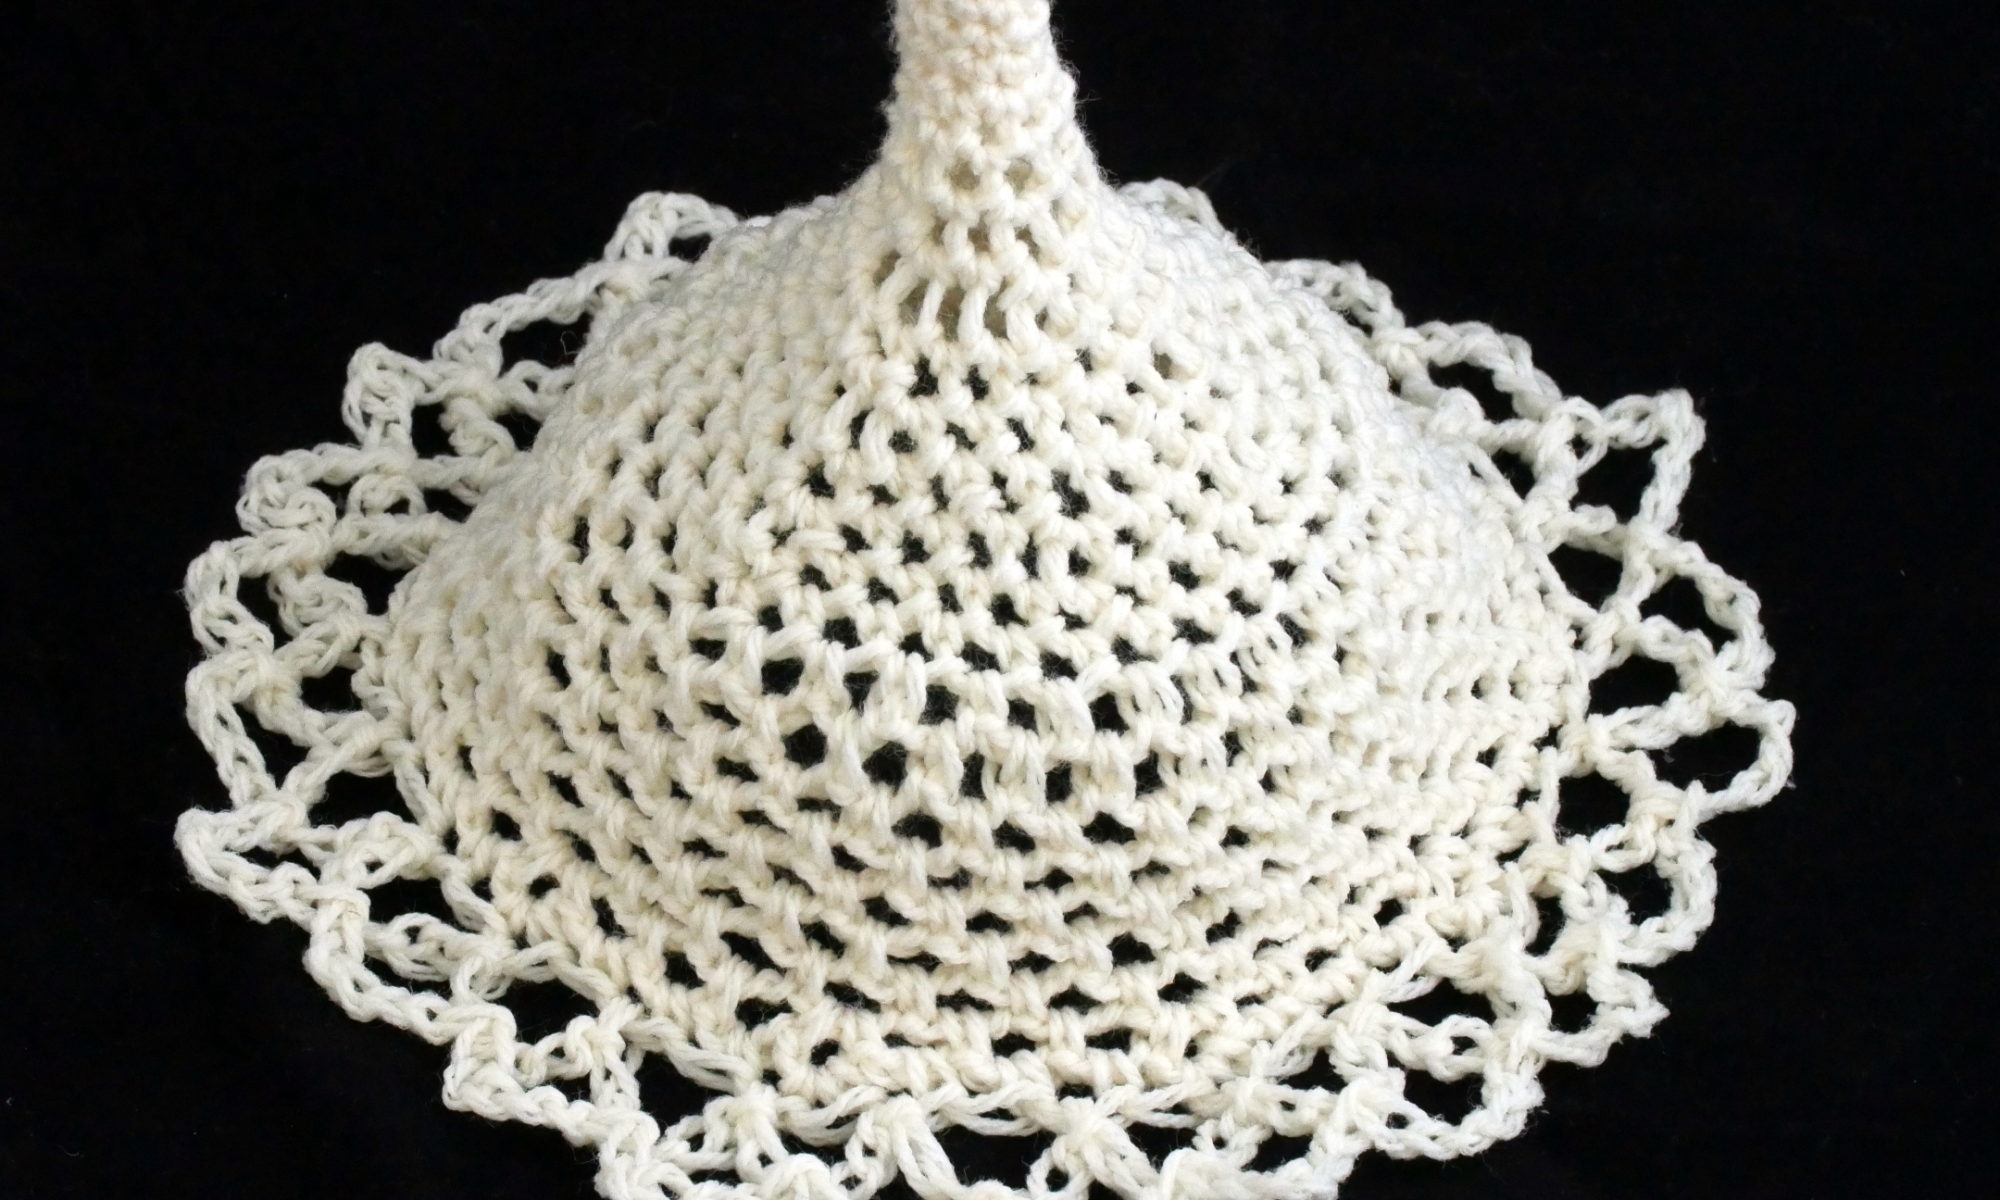
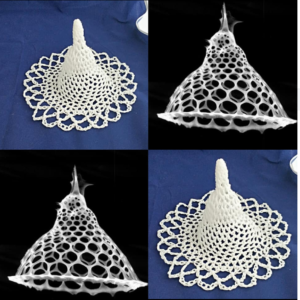
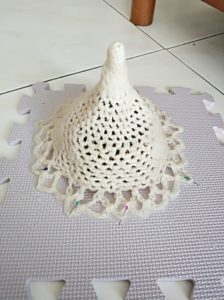
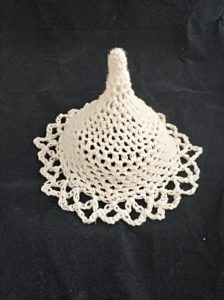
Here’s what we’ll be making, along with the image that inspired my design.

 (image from dorabella-ommo.blogspot.com)

Skill level: easy- intermediate

Skills needed: basic crochet

Materials needed:

  • white or off-white yarn
  • three sizes of crochet hook (sizes aren’t too important, but the biggest one should be a lot bigger than the smallest one. I used 3.25 [US D, UK 10], 5.5 [US I, UK 5], and 10 mm [US N, UK 000] hooks.)
  • white glue or starch
  • blocking board for knitting, or a clean sheet
  • rust-proof straight pins
  • a few bowls and bottles of varying sizes for shaping the radiolarian

Let’s get started! 

1.  With smallest hook, crochet six single stitches in a magic circle. Sl st last st to first st.  Cinch tight (6 stitches)

2. (Inc, sc) * 3. (9)

3-5. Sc around. (9)

6. Switch to the next size of hook – I used a 5.5 mm. Sc around (9).

7. Sc around. (9)

8. Switch to largest hook – I used 10 mm. (Inc, sc, sc) * 3. (12)

9. (Inc, sc) * 6. (18)

10, (inc, 2sc) * 6. (24)

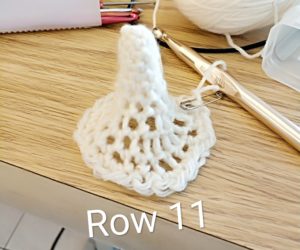
11. Sc around. (24) Here’s what our radiolarian looks like at this point. 

12. (Inc, 3sc) * 6. (30)

13-14. Sc around. (30)

Beginning of chain section. Switch back to small size size hook.

15. Sl st into first st of round. (Chain 3; sc into following st) around. (30 sections of chain 3 segments)

16-23. (Chain 3, sc into next chain section) around.

24. (Chain 3, sc into SAME chain section for an increase, [chain 3, sc into next chain section] * 2) * 10.

25. Switch to largest size hook (10 mm). One row break from chain section. (Inc * 2 into one chain section,  [sc into next chain section] * 3) * 10.

26. Final chain section. (Sl into first stitch, chain 5, skip next stitch, sl st into following) around.

27. (chain 5, skip next stitch, sl st into following) around. Finish off and weave in end.

If you want to make the radiolarian stand up and hold shape, you’ll need to use a stiffening solution. There are several ways to do this, such as by diluting white glue with water or by cooking a starch solution. You can find instructions for making a stiffening solution here: https://craftingagreenworld.com/articles/diy-natural-fabric-stiffeners/

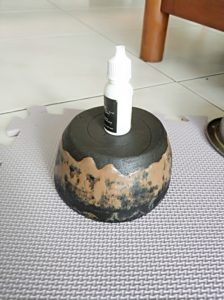
Once you’ve made the solution and let it cool enough so you can touch it, immerse the radiolarian form fully in the solution. Let it sit and soak for about a minute. In the meantime, prepare a clean area where you can stretch it over a mold and pin it down. I like to use a blocking mat for knitting. Assemble a few different shapes that will fill out your radiolarian. I used a bowl with a little bottle on top of it to fill the tip of the radiolarian.

Stretch the radiolarian over the shapes, fan out the lacy edges, and pin the edges down with rust-proof straight pins.

Let the form dry, under a fan if necessary, unpin, and detach the radiolarian carefully from the shapes and blocking board. Good job!!

Make your own ephyra!

The ephyra is a stage in the life cycle of a jellyfish. Check out these instructions for how to make your own! The following images are my crafted ephyra interspersed with the images that inspired it.

.
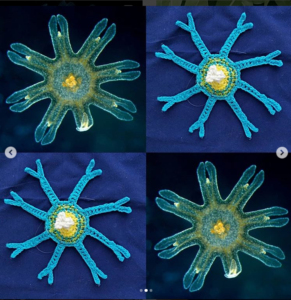
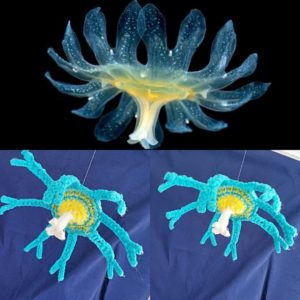
 (image source: Ingo Arndt)


Skill level: Intermediate

Skills needed: basic crochet, I-cord knitting

Materials needed:

  • white, yellow, blue, and green yarns

  • stretch jelly elastic

  • two 3.75 mm double

  • -pointed knitted needles (US 5, UK 9)

  • 3.75 mm crochet hook (US F; Canada/UK 9) 

I used yarn held with stretch jelly elastic (like the kind used to make stretchy beaded bracelets) in order to mimic the translucent quality of the ephyra.

Let’s begin!


With white yarn and elastic, cast on 4 knit stitches, leaving a long tail, about 16 inches.

Rows 1-7: Knit 4 stitches in I-cord. (4 stitches)
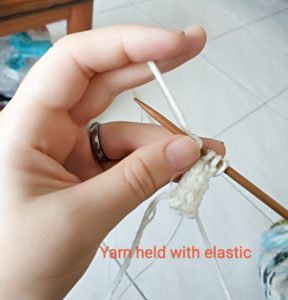
8. switch to crochet and yellow yarn with elastic.

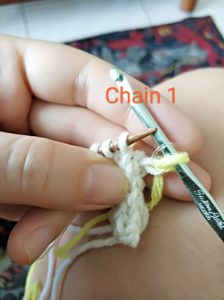
With stitches on knitting needle, insert crochet hook into first stitch. Chain one with yellow yarn and elastic.
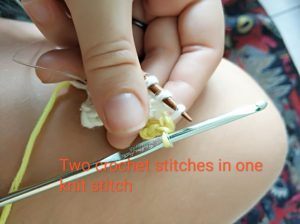
Increase by doing two yellow single stitches in the one knit stitch. Remove stitch from knitting needle once you’ve increased the knit stitch.
Repeat crochet increase in the next three knit stitches and put knitting needles away. Slip stitch into first crochet stitch, joining the round. (8).
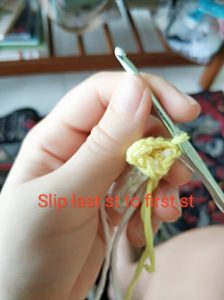
9: increase in each stitch (16).

10: (inc, sc)*8. (24)

11: One round in blue and elastic. Sl st with blue yarn into first stitch of round. Chain 1. In same st, increase. 3 sc in next 3 sts. (Inc, 3 sc) * 5. (30)

12. One round in green and elastic. Skipping chain st, sl st with green yarn into first stitch of round. Chain 1. In same st, increase. 4 sc in next 4 sts. (Inc, 4 sc) * 5. (36)

Work in blue and elastic for remainder.

13. Skipping chain st, sl st with blue yarn and elastic into first stitch of round. Chain 1. In same st, increase. 8 sc in next 8 sts. (Inc, 8 sc) * 3. (40)

Working the arms.

Sk ch st, sl into first st. Chain 16.

Working back along chain, 5 sl sts. Before working the rest of the chain, chain 6. (In the image, I ran out of elastic and am using only blue yarn, but please do work with elastic and yarn throughout the pattern!)
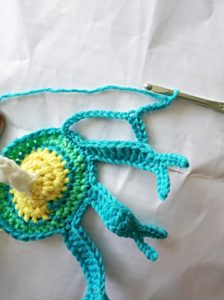
Working back along secondary chain, 5 sl sts.

Now returning to the main chain, 1 sc, 1 hdc, 8 dc. At end of chain, sl st into the next st of the circle. Sl 4 more, then repeat from “chain 16” to make 7 more arms.

When you’ve slipped into the st just before the first arm, fasten off.

Petals on I-Cord

Go back to the tail of white yarn and elastic that you left at the beginning of the I-cord.
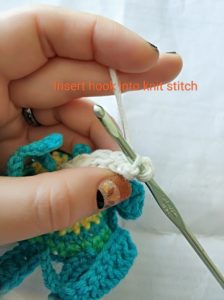
(Sl into the next st, ch 3 and sl back into the same st) * 4. When you’ve finished 4 petals, finish off and weave in all ends.

Stiffening the ephyra

If you want to make the ephyra stand up and hold shape, you’ll need to use a stiffening solution. There are several ways to do this, such as by diluting white glue with water or by cooking a starch solution. You can find instructions for making a stiffening solution here: https://craftingagreenworld.com/articles/diy-natural-fabric-stiffeners/

Once you’ve made the solution and let it cool enough so you can touch it, immerse the ephyra form fully in the solution. Let it sit and soak for about a minute. In the meantime, prepare a clean area where you can stretch it over a mold and pin it down. I like to use a blocking mat for knitting.

Assemble a few different shapes that will fill out your radiolarian. I just used a bowl that fit ok. Stretch the ephyra over the bowl/mold, fan out the arms, and pin the edges down with rust-proof straight pins. I recommend that you try to pin the two sections of the arms close to each other so they form less of a v-shape and look more like the picture we’ve based the ephyra off of.
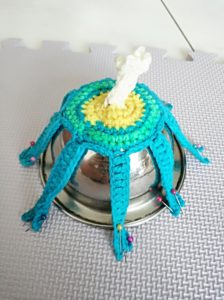
Let the form dry, under a fan if necessary, unpin, and detach the ephyra carefully from the mold and blocking board. Good job!!